
Choosing the best Concert Lighting starts with the music, the room, and the people in it. A small club needs a different approach from an outdoor festival. Look at the stage dimensions, ceiling height, sightlines, and available power before choosing fixtures. Then consider the show’s mood. A warm amber wash can soften an acoustic set, while sharp beams and saturated color may suit a high-energy chorus. The equipment should serve the performance, not compete with it.
Veteran concert lighting designer Patrick Woodroffe has shaped major live productions around the relationship between light and music. A useful paraphrase of his approach is: “Light should help the audience feel the performance, not just see the stage.” That distinction matters. A row of bright fixtures may look impressive during a soundcheck, yet overwhelm faces or leave the back rows in darkness. Test from several audience positions. Watch how colors render skin tones. Check whether haze, LED walls, and moving fixtures work together rather than muddying the view.
Details matter. So does restraint. Ask about fixture quality, control options, setup time, and backup plans. A thoughtful lighting designer can adapt the rig to the venue and the artist’s goals. Still, no checklist guarantees a perfect show. Even a carefully planned scene can feel flat once the band starts playing. That is why rehearsal, adjustment, and honest feedback belong in the process. The best choice balances visual impact, practical limits, and the emotion the audience should carry home.
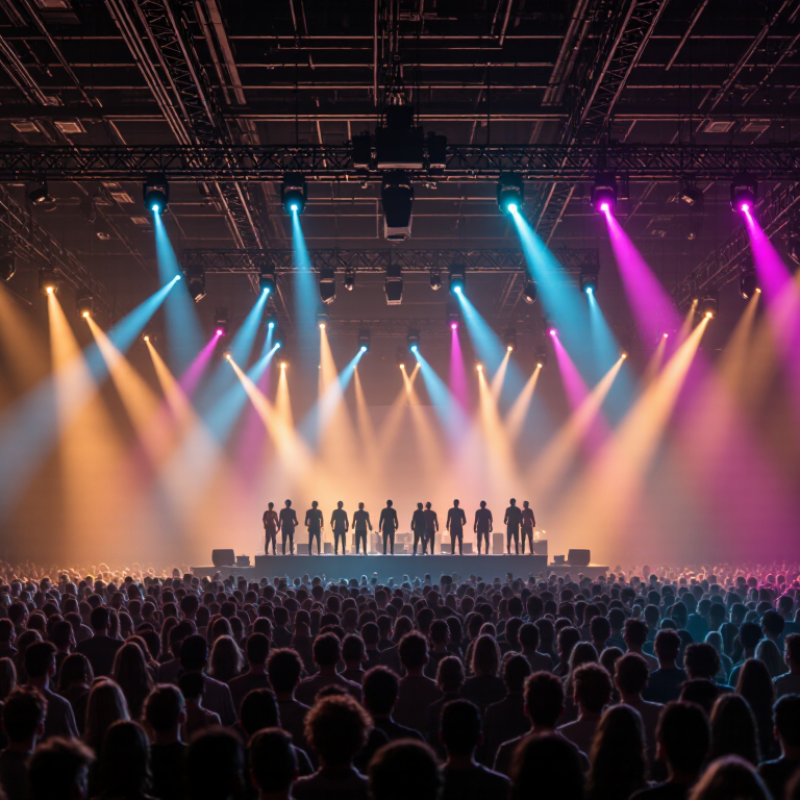
A concert lighting plan should begin with the feeling the audience should carry away, not a list of fixtures. Decide whether the show should feel intimate, tense, celebratory, or raw. For an acoustic set, warm side light can reveal a performer’s expression without washing out the stage. A high-energy set may benefit from sharper contrast and movement that follows the music. That choice shapes everything. Discuss the visual direction with the artist and production team, then connect it to specific moments in the set. A quiet verse and a final chorus rarely need identical treatment.
Picture the show from the back row, the side seats, and the floor near the stage. Check whether faces remain visible and whether bright beams distract from important moments. Lighting that looks striking in an empty venue can feel harsh once the room fills. Build cues around the music, but leave room for natural changes in tempo or performance. Keep practical limits in view, including sightlines, available rigging, power, and setup time. A venue’s restrictions may require a simpler design than expected. It is easy to overdesign a show. More effects do not automatically create more emotion, and sometimes a transition needs another rehearsal.
Before selecting fixtures, map the venue’s ceiling height, rigging positions, stage width, and seating zones. A low ceiling may limit steep angles, while balconies can block beams aimed from the rear. Mark the nearest, farthest, and side seats on a scaled plan. Then check each fixture’s beam spread and throw distance against those sightlines. Measure from the actual hanging position, not the stage edge. Distance changes everything.
Walk the room if possible. Look for sightline obstructions, reflective surfaces, and places where performers’ faces may fall into shadow. Check vertical illumination at the front, middle, and rear; a bright stage can still leave faces unreadable from the back. One easy mistake is trusting a tidy lighting plot before testing it in the venue. Even a good plot can mislead.
Color should also hold up across viewing zones. The IES TM-30-20 method evaluates light-source color rendition using 99 color evaluation samples and reports fidelity (Rf) and gamut (Rg). Use those measures when comparing sources, then check skin tones and set colors from several audience positions. Don’t judge only from the control desk. A red jacket that looks vivid nearby may appear dull from the balcony. Walk the seats, adjust, and check again.
Assess the venue, stage layout, and viewing distances
A 20° beam produces an approximate footprint diameter of 3.5 m at 10 m, increasing to 14.1 m at 40 m. Use the venue’s throw distances and stage layout to check whether fixtures can cover the intended areas; actual results vary with optics, focus, and obstructions.
Compare Lighting Fixtures, Beam Effects, and Color Options
Choose fixtures by what the audience needs to see. Moving-head spots create crisp edges for performers and soloists. Wash lights spread broad color across a stage, while strobes add brief, high-impact bursts. A narrow beam can cut through haze, but it may look harsh when aimed directly at the crowd. Test fixtures from the back of the venue, not just beside the stage. Sightlines change everything.
Beam effects depend on venue size, haze, and the music’s pace. Tight beams make strong aerial patterns; wider beams feel softer and fill more space. Color matters, too. Deep blues and reds can shape a dramatic scene, while warm whites help skin tones look natural. LED fixtures offer flexible color mixing and can reduce power demand.
The U.S. Department of Energy reports that LEDs use at least 75% less energy than incandescent lighting and can last up to 25 times longer. That is a broad benchmark, not a direct comparison of every stage fixture.
One trade-off: saturated colors can make faces harder to read. Check them in the room, at show brightness. I still find it easy to overdo the red.
How to Choose the Best Concert Lighting?
Choose a control system by counting fixtures, control channels, and backup needs. ESTA’s DMX512-A standard allows up to 512 control slots per universe. That limit arrives quickly. A fixture using 30 channels consumes a substantial share of one universe, so map the rig before choosing a console or network layout. Test cues, blackout behavior, and backup playback with the actual fixtures. A tidy patch on paper can still become confusing in a dark control booth.
Calculate power from fixture input ratings, not lamp output. Twelve 300-watt fixtures draw 3,600 watts; on a 120-volt supply, that is 30 amps before other loads, startup behavior, and circuit limits. Ask a qualified electrician to verify distribution, connectors, grounding, cable paths, and protective devices. Keep cables clear of walkways, and inspect them for crushed insulation or warm plugs during rehearsals. U.S. Bureau of Labor Statistics data recorded 5,283 fatal work injuries across all industries in 2023; this figure is not concert-specific, but it underlines why safety checks deserve real time. One detail is easy to miss: label both ends of every feeder. It saves minutes, and sometimes prevents a rushed mistake.
| Evaluation Area | Options and Practical Data | Best Fit | What to Check Before Choosing |
|---|---|---|---|
| Lighting control | DMX512: A standard DMX universe carries up to 512 control slots. RDM: Adds two-way communication for compatible devices, such as remote addressing and status checks. | DMX512 works well for straightforward rigs with a manageable fixture count. RDM can simplify setup and troubleshooting when fixtures support it. | Count each fixture’s DMX channels, allow capacity for future additions, and check device compatibility. A fixture using more than one channel consumes multiple slots. |
| Networked control | Art-Net and sACN carry lighting-control data over Ethernet and can distribute multiple DMX universes across a network. | Useful for larger rigs, multiple control locations, or productions with many universes. | Plan the network layout, node capacity, addressing, and backup strategy. Keep lighting traffic on a properly configured network rather than assuming any network setup will perform reliably. |
| Fixture power | LED fixtures generally use less power than comparable high-output tungsten fixtures, but actual consumption varies by model, output setting, and operating mode. Use each fixture’s rated input data. | LED fixtures can help reduce electrical demand and heat for many touring and venue applications. | Check maximum input watts or amps on the fixture documentation. Do not estimate load from light output alone; moving fixtures and accessories may have additional requirements. |
| Circuit capacity | For a single-phase load, approximate current can be estimated as I = P ÷ (V × PF), where I is current in amps, P is input power in watts, V is voltage, and PF is power factor. Actual requirements depend on the equipment and local electrical rules. | Use a load schedule to distribute fixtures across available circuits before the show. | Account for voltage, power factor, startup behavior, connectors, and other loads on the same circuit. Have a qualified electrician confirm circuit capacity and applicable continuous-load limits. |
| Power distribution | Breakout boxes, distribution equipment, and cables must be rated for their intended current, voltage, environment, and connector type. | Properly rated distribution is essential for temporary stages, outdoor events, and larger lighting systems. | Use correctly rated equipment, protect connections from moisture where required, avoid overloaded circuits, and keep cable routes clear of trip hazards and vehicle traffic. |
| Rigging and overhead safety | Fixtures, clamps, safety bonds, truss, and suspension points must be suitable for the equipment and installed according to their rated limits and applicable standards. | Any fixture mounted above performers, crew, or audience members requires a planned and inspected rigging arrangement. | Use compatible clamps and secondary safety bonds, secure accessories, inspect equipment before use, and have qualified personnel approve overhead installations. |
| Heat, weather, and access | Lighting equipment can produce heat, and outdoor suitability depends on the fixture’s environmental rating and installation conditions. | Choose fixtures and protection appropriate to the venue, weather exposure, and ventilation available. | Maintain required clearances, keep ventilation paths unobstructed, protect equipment from unsuitable exposure, and provide safe access for focus, maintenance, and emergency response. |
| Final selection | Compare control compatibility, total calculated load, fixture output, rigging needs, and the production’s available crew and infrastructure. | The best system is the one that meets the show’s lighting goals while fitting the venue’s verified power, network, and rigging capacity. | Confirm the plan with venue staff and qualified electrical and rigging professionals. Follow local codes, equipment instructions, and event safety procedures. |
Choosing concert lighting starts with a realistic budget, not a list of dramatic effects. Allocate funds for fixtures, control equipment, crew time, transport, and a small contingency. A limited budget can still create depth through careful placement and restrained color changes. Ask the venue about ceiling height, power access, rigging limits, and available equipment before requesting estimates. These details can prevent costly surprises. For smaller shows, prioritize clear front light and a few flexible side or back lights. Keep performers visible.
Treat the lighting plan as a working document. Mark key moments in the set, then note the color, brightness, and movement each moment needs. Share the plan with the lighting operator and stage manager. Test transitions in the actual room when possible. A bright rehearsal can hide shadows that appear once the audience arrives. Check the darkest song and the quickest cue change. Test it early. A neat diagram can still fail when a microphone stand blocks a beam. Revise the plan without fuss.
Tips: Reserve 10–15 percent for unexpected needs, if possible. Label cues in plain language, such as “warm chorus.” Record a phone video from the audience area. Check faces, cables, and sightlines, not just the stage picture. Keep a simpler fallback look ready. It may be less exciting, but dependable lighting beats a rushed setup.